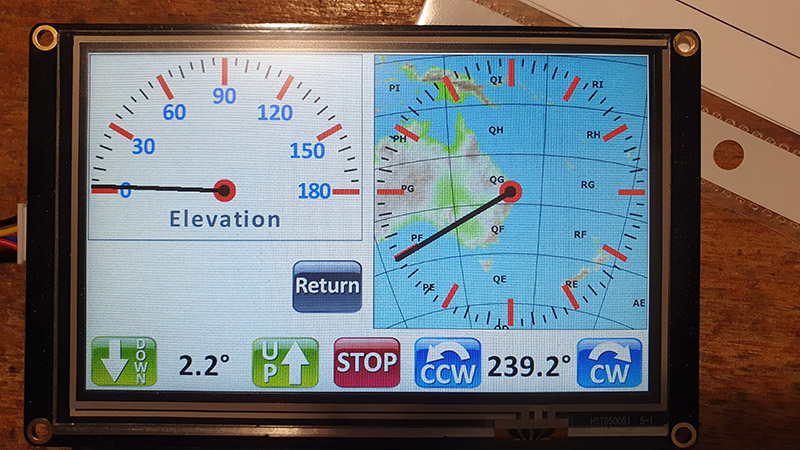
In the next VK4GHZ Nextion for K3NG Rotator Controller NX8048K050 release (V2021-05-21) I’ll include the ability to toggle between the standard Big Az Gauge and your own custom gauge background.
This was inspired by the great idea of Andrej, S56VLV.
Switching to a custom azimuth background image is achieved with a long touch at the center of the Big Az Gauge.
This selection setting is remembered in Nextion EEPROM for next time, along with your other Nextion config settings.
A short touch in the center of the Big Az gauge still allows for direct Az bearing entry via the keypad.
How Do I Implement This?
You will need to generate your own image in your own preferred image editor, such as Photoshop.
(There are other free image editors out there, but aim for something more capable than Windows Paint!)
Image needs to end up being 390 x 390 px as a JPG or PNG.
For small fiddly stuff, I usually create image masters at 2x or 3x final size and re-size when doing a ‘Save for Web’.
This image will replace place holder image in picture slot #188.
Save Nextion project, and upload project via your preferred method.
Either as .hmi file via a USB FTDI adapter or create a .tft file output and upload via microSD card.
Resources:
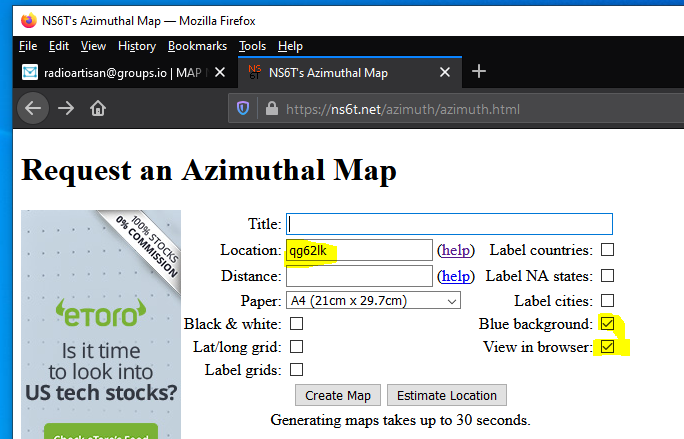
NS6T Azimuthal Map
The azimuthal map seen above was generated by the online utility by NS6T:
https://ns6t.net/azimuth/azimuth.html
Enter your grid locator, and you can experiment with your desired ‘look’.
If View in browser is not ticked, a pdf will be generated.

Great Circle Mapper
A Windows 10 application by EI8IC is available from:
https://www.mapability.com/ei8ic/gcm
Trial period last 30 days, then USD$10 registration.
This produces nice and ‘clean’ images.
Country outlines (with NS6T) are appropriate for large A3 hard copies, but IMO this clean look is preferred for small displays.
Background = 0

Background = 15

Great Circle Map
Great Circle Maps by SM3GSJ has not been updated since 2010 but works fine on a Windows 10 PC.
Map resolution is not great but more than adequate for what ends up being 390 px square for the 5.0″ Nextion.
https://www.qsl.net/sm3gsj/gcm.htm
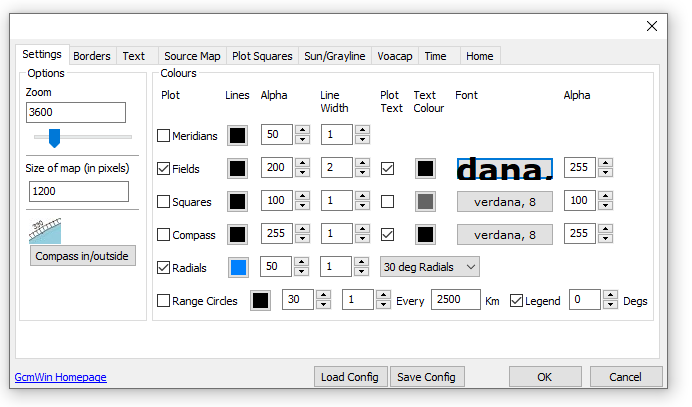
Although clunky by today’s standards, this application offers the ability to overlay Maidenhead Fields, and set projection range, which is handy for generating a map appropriate to 6M and 2M Es VHF DXing.
The following image on QG62 had zoom set to 3600 km:
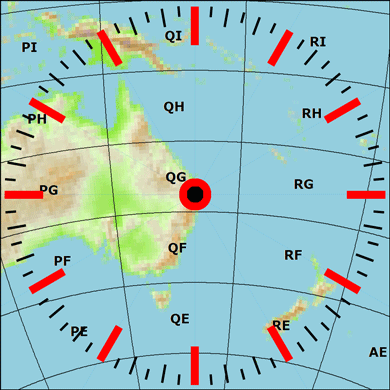
Grid field text is Verdana Bold 24. Note alpha transparency values.
Irrespective of your preferred look, make a screen shot capture of the generated map and paste this into your image editor to ultimately create a 390 x 390 px PNG image.
Resources
Nextion Editor download:
https://nextion.tech/nextion-editor/
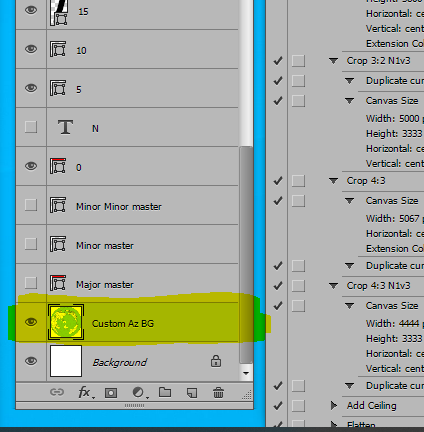
Photoshop .psd Master template use summary
The official Photoshop .psd file ‘Compass Rose.psd’ can be used as a template for those with Adobe Photoshop.
If you do not have Photoshop, other image editors are known to work with a .psd file, but you will need to research this.
Using this template will allow the easy creation of a custom image whilst matching existing gauge images.
Or, you can go nuts and change the look of all the gauges!
Be careful!
This Photoshop master is used for all Azimuth and Elevation gauge variants, and has many layers.
This Photoshop master is sized at 980 x 980px.
Copy & Paste your custom image into Photoshop and drag this new layer down to just above the existing Custom Az BG layer… unless you live near Brisbane! 😉
If you paste an image that is larger than 980 x 980 px you have some wiggle room and can size/manipulate the image layer to be nice and centered.
Bearing numbers were removed with a white paintbrush for a cleaner look.
Being a larger master size, Save For Web as a PNG and re-size down to 390 x 390 px.
This 390 x 390 px image will be imported into Nextion Editor.
Run Nextion Editor and open the hmi file.
Replace picture slot #188 with your own custom image.
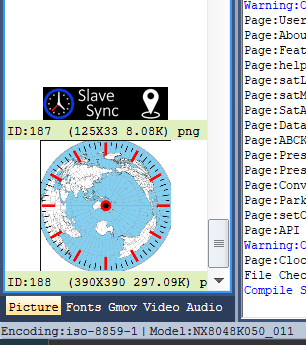
Compile and upload to Nextion.
Great Circle Mapper (by EI8IC) used to create these background images:

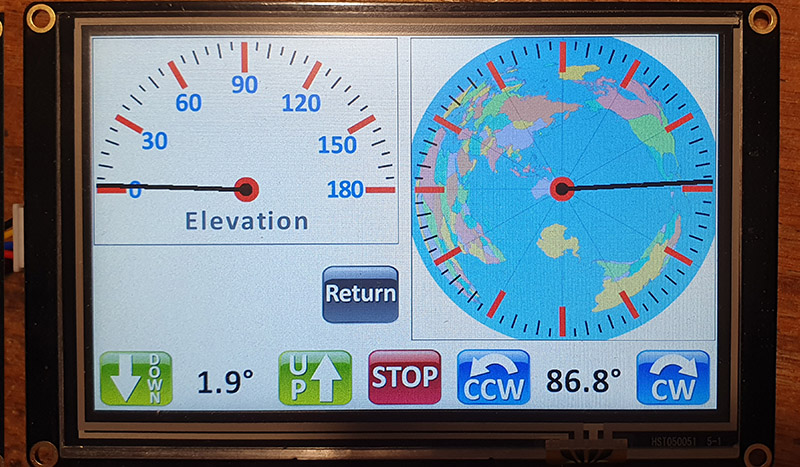
Great Circle Map (by SM3GSJ) used to create this background image:
