It’s not everyday you come across a project from somebody else that is well documented, relatively easy to pick up and work with, and, has the ability to customise it to your hearts content!
The K3NG rotator controller is one such project. Ideal for anyone wanting to interface their rotators/positioners with a PC for, say, tracking satellites and/or EME.
The fact that this controller project had Nextion touchscreen support made it a no-brainer to choose.
LCDs and switches are so last decade!
Here is a pictorial of what can be done with a Nextion 3.5″ touch screen.
The main ‘Numerals’ screen.
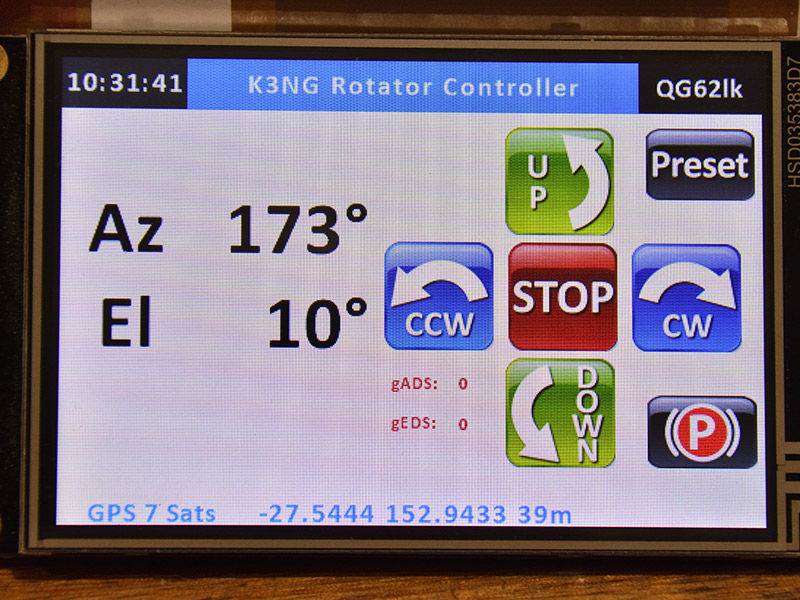
Any small red characters you see are purely for debugging purposes. They wouldn’t be visible on release versions.
There is also the ability to “park” the antennas at the predefined Az/El, and call up presets you can easily set yourself.
Alternatively, it can start with a graphical screen.
Elevation is on the left side, the same as a Yaesu G-5500 controller.

Gauges are a bit primitive with the Basic and Enhanced model Nextions, but they do the job.
There are a lot more options available for nicer animated graphics with the newer ‘Intelligent’ series displays, but they only come in large 7″ and 10.1″ versions, and are quite expensive.
The area under the elevation gauge cannot be used, a limitation of this display.
Whether the display starts in the numeral or dials page is determined in the Configuration page.
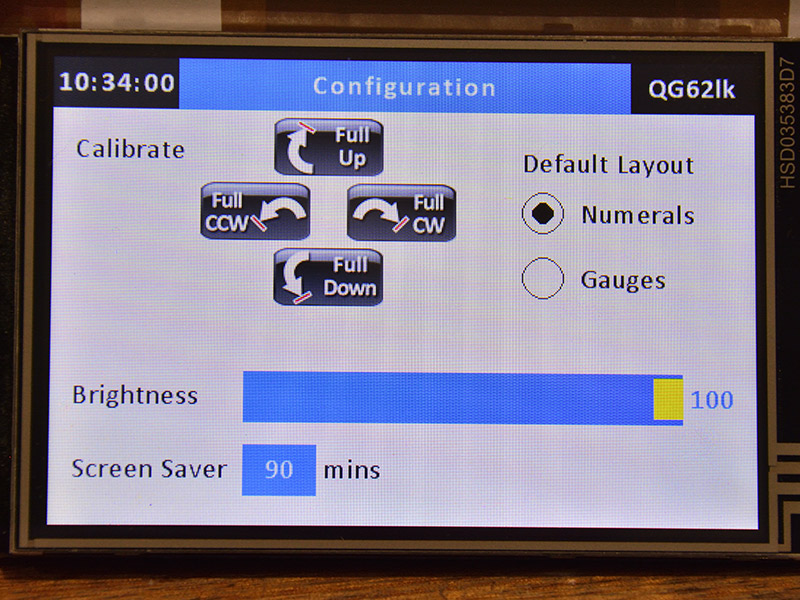
Brightness, screen saver, and analogue rotator calibrations can also be managed from this page.
No matter how large the screen is, screen space is never enough!
With that in mind, some ares become multi-purpose.
The title (top, center) also becomes the vSS1 status line, when there is a message to display.
Touch the clock, and you navigate back a page. Touch the grid locator and you advance forward a page.
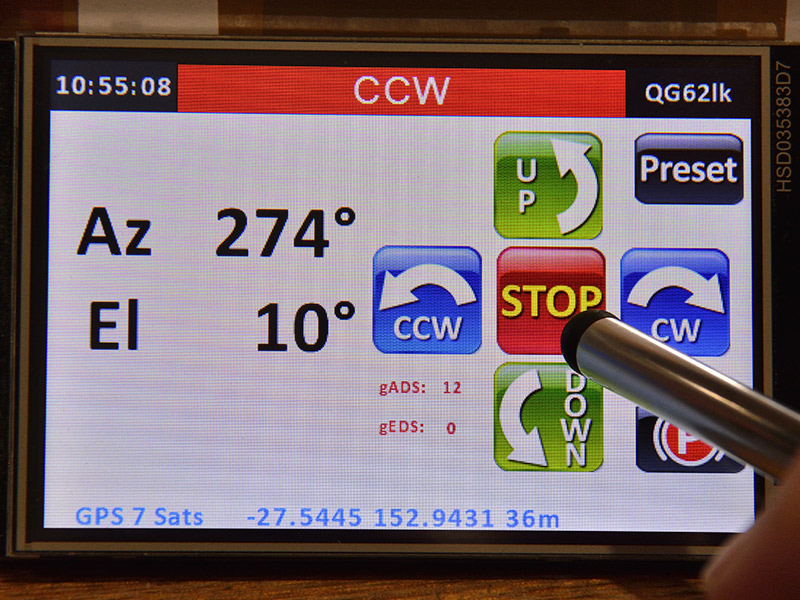
When touching buttons, a high-lighted version appears for visual touch confirmation.
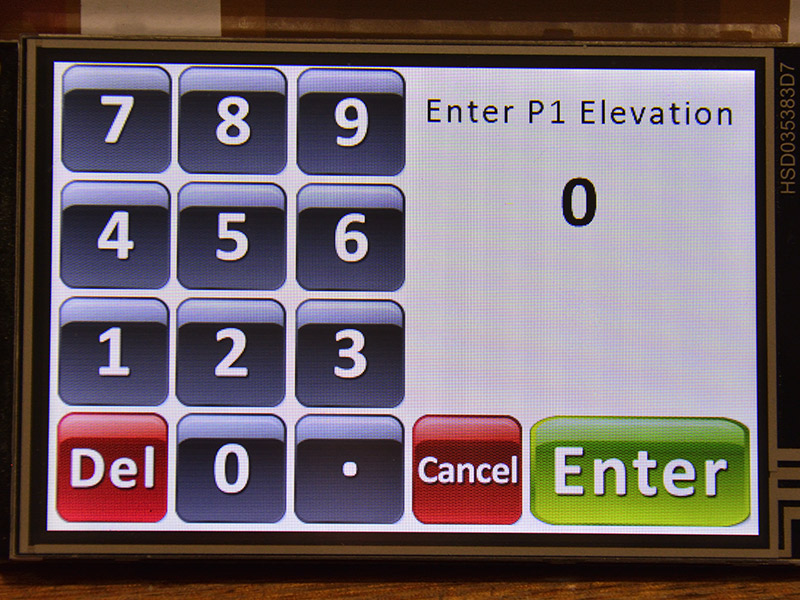
The keypad has been tarted up!
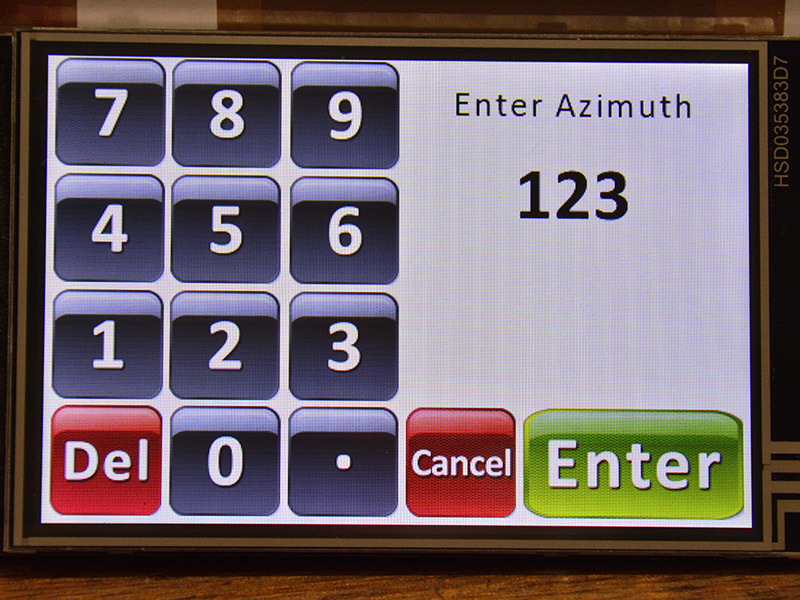
Manual input for azimuth and elevation can be entered via this keypad.
There is a page (previously known as “Tertiary”) for sun and moon tracking.
This is a work in progress. The “MT” and “ST” icons are only there to touch in order to “wake up” the Arduino that it should be reporting the moon or sun is visible when continuous tracking is optioned.
Hint hint, Goody!
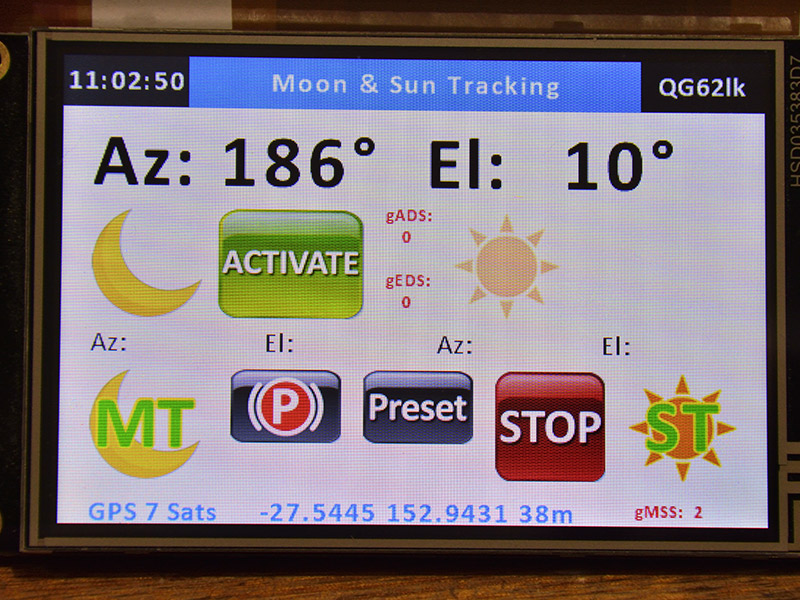
When the moon (or sun) has risen, then tracking can be activated.
Once “activated” the button changes to “Deactivate”.
Note below, the sun icon is “greyed out” indicating the sun is not currently visible.
Just as well – it’s 21:02 local at night when these photos were taken!

Excuse the debug info (small red text).
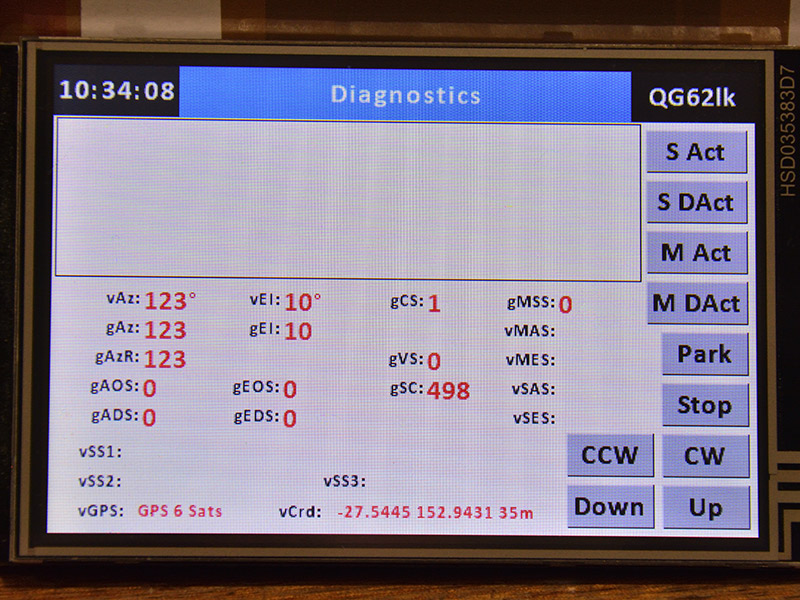
This is the Diagnostics page, for viewing system variables and nerdy stuff.
There are also some buttons to manually activate routine functions:
Presets page.
Here, three single-touch preset can be accessed.
From either main page, it’s two touches to a favorite preset position.
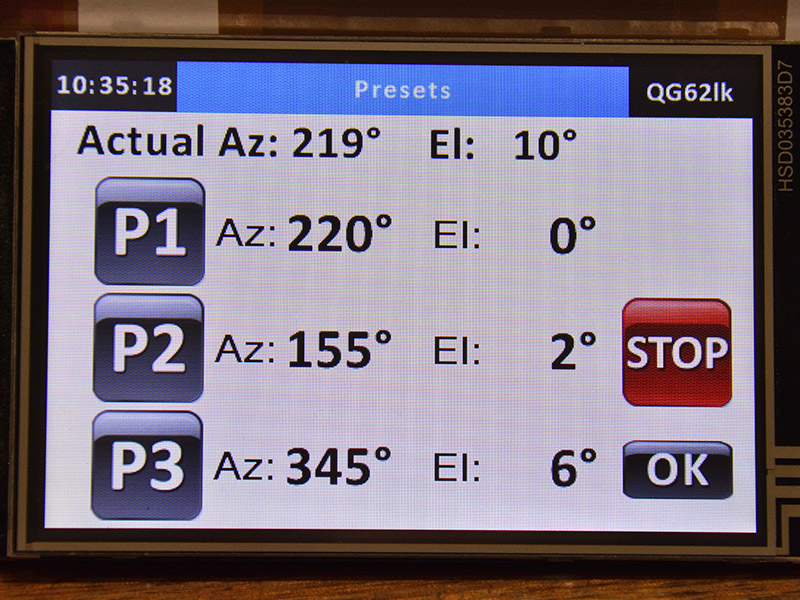
Touch the azimuth or elevation numbers (ie; “220” as per above), and the preset values are easily changed.
All my K3NG Rotator Controller articles can be found here;
https://vk4ghz.com/category/ham-radio/k3ng-rotator-controller/
K3NG Rotator Controller project video on my Youtube channel;
https://www.youtube.com/user/VK4GHZ
