Depending on the size and wind load of your antenna system, you may be able to get away with using tripods and mounting schemes intended for consumer grade video and still photography. 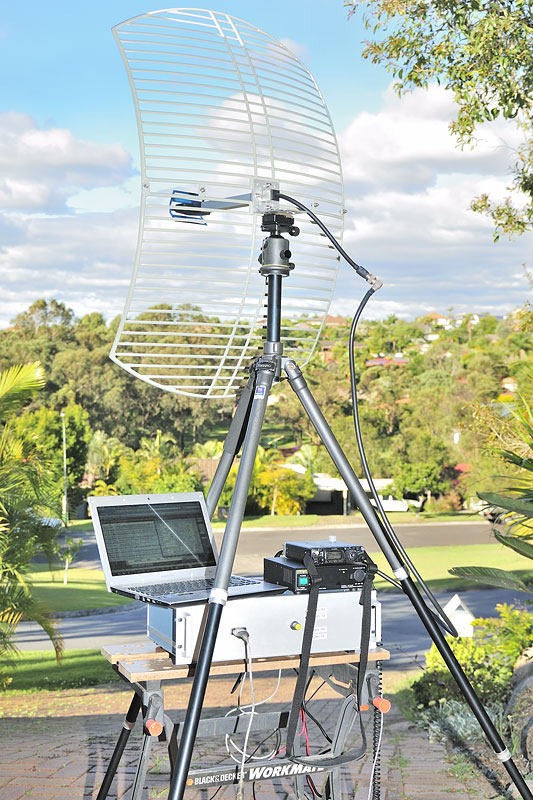
At right, you’ll see an example of 2.4 GHz gridpack (1000 x 600mm) mounted on top of a Manfrotto Quick release plate, on a heavy duty Benro ball head and Benro camera tripod.
“Heavy duty” can mean different things, but in the context of a modern dSLR camera, anything capable of 5-10 kg is generally regarded as “heavy duty”.
You would not mount, say, a 65cm offset steel dish on this arrangement.
Besides falling over, it would break the ball head.
Grid packs come in two varieties
- Solid cast
- Wire frame
Solid cast types (such as this one) are much more robust than a wire type (a consideration when going out into the field), and still weigh under 2 kg.
 Weight wise, this is comparable to a dSLR with lens, although the camera will tend to be a more balanced load, a ball head such as this works just fine, as pictured.
Grid packs inherently have much less wind loading than a solid reflector.
For antennas with solid reflectors, “dishes”, we need to consider a mounting arrangement that can support a much heavier load.
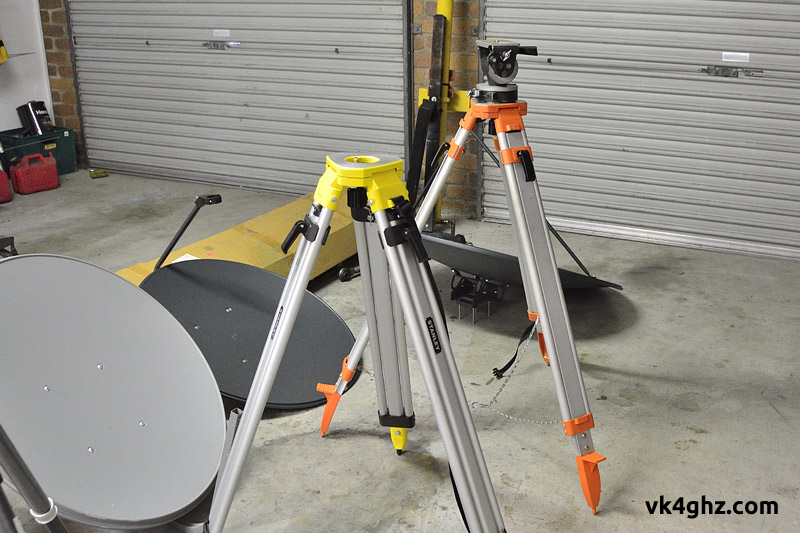
Laser Level Tripods
 Surveyor tripods, AKA laser level tripods, can be purchased from Bunnings for $75 (the yellow tripod in the picture).
Beware of specialty shops. I stupidly paid $155 for the orange tripod from Johnny Appleseed which is almost identical, except for the colour, before I discovered Bunnings stocked them!
These tripods can also be purchased off eBay, but they actually work out a few dollars more expensive, with shipping costs. You might as well go to your nearest Bunnings, and if there is a problem with it, you can easily take it back.
Also beware of the tripods that have a domed top. The variants with a flat surface are much easier to work with.
Pan & Tilt Options
 Now that we have a suitable tripod, what options are there to pan and tilt the dish around, on top of this tripod?
A popular entry-level low-cost method is to use CDs.
Yes, those “coasters” you’ve accidentally created, or perhaps some outdated software from ye ol days.
Not an ideal rotation bearing, but you can get away with it. Of course, you’ll still need to manually adjust the legs for elevation adjustments.
Professional pan/tilt heads can be very expensive, and cost north of $2,000 +++, but they do come up on eBay every now and then, and for reasonable prices.
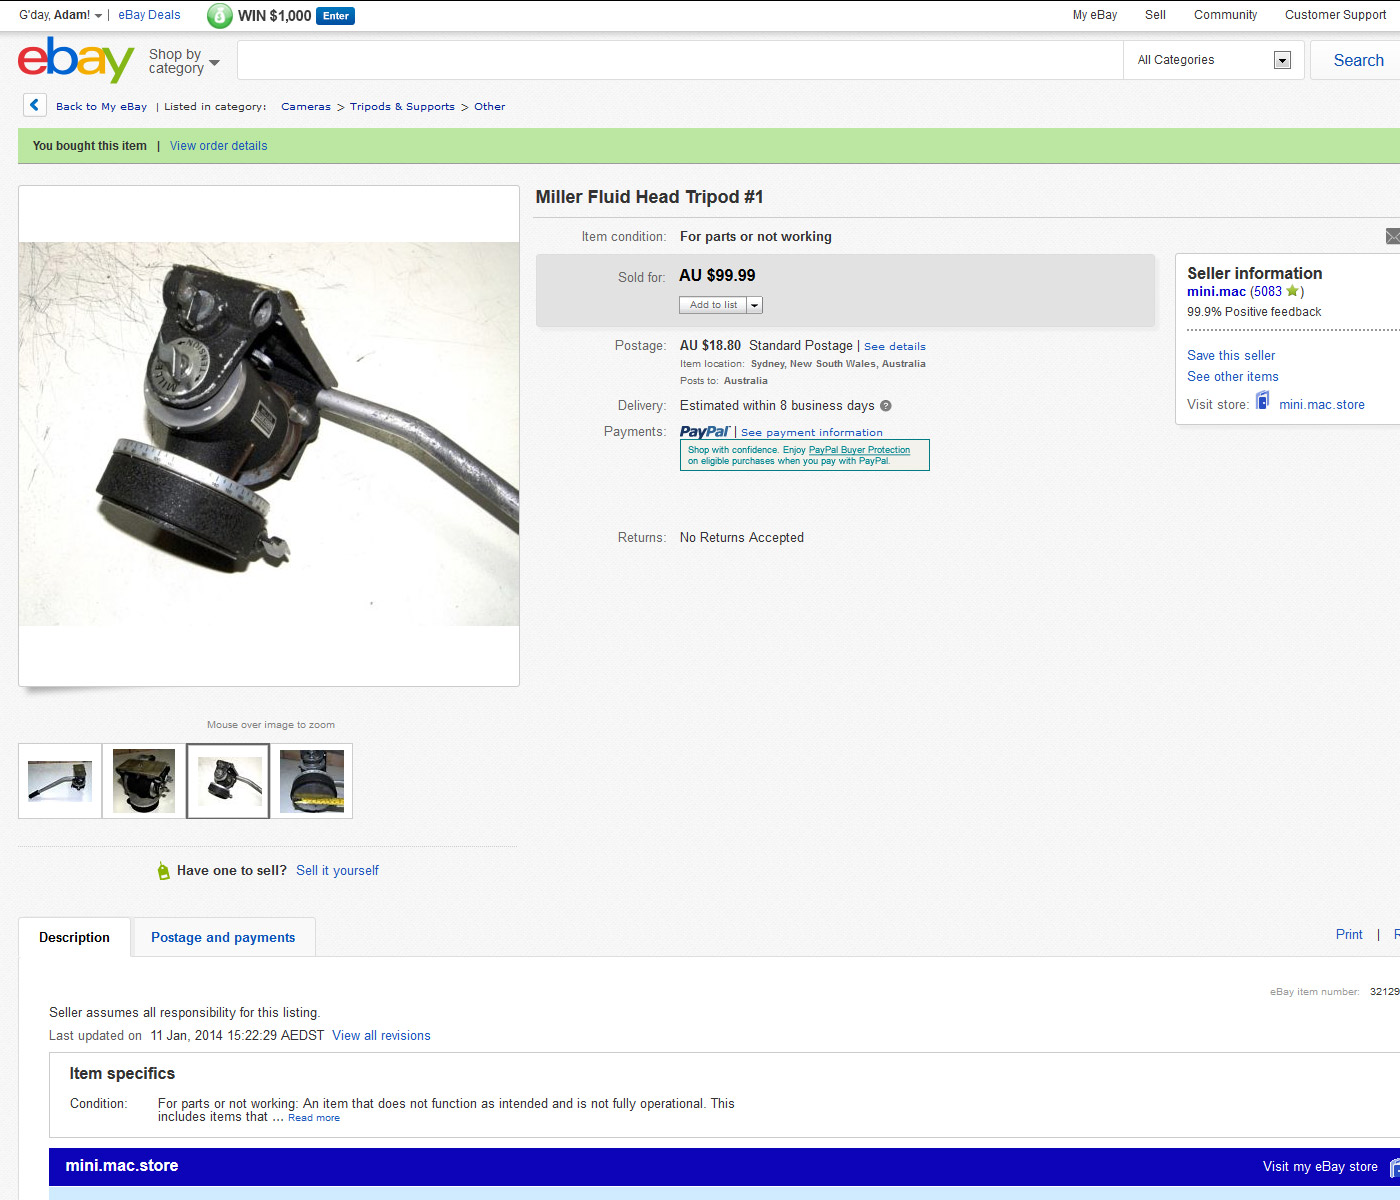 Often they are described as “for parts, or not working”.
Sellers do this to get rid of any idiots with unrealistic expectations of getting a $2000 head in mint condition for a fraction of that!
This particular head, a “Miller” fluid head (who still exist in Sydney), and fluid heads like it from the late 1970’s/early 180’s, were typically used with an Ikegami HL79 broadcast EFP camera on it. Broadcasters like the ABC purchased a heap of these for the 1982 Commonwealth Games coverage.
 Back then these tube cameras could weigh between 10-15 kg depending on lens, viewfinder and back options.
Whilst these fluid head have long since been retired from service, they are still perfectly good to use for amateur radio microwave dish mounting applications.
I currently use one of these Miller fluid heads with a 60cm prime focus Mitec dish which also has a tray for the transverter system, as you would have seen in recent activity day videos. When an identical unit came up for offer on eBay, it was a no-brainer!
Modifying to suit a Laser Level tripod
These heads will have a 1/4″ threaded hole, as per the standard with photography and video tripods.
Laser level tripods use a larger 5/8″ 11 TPI thread, so all we have to do is drill it out, and re-tap.
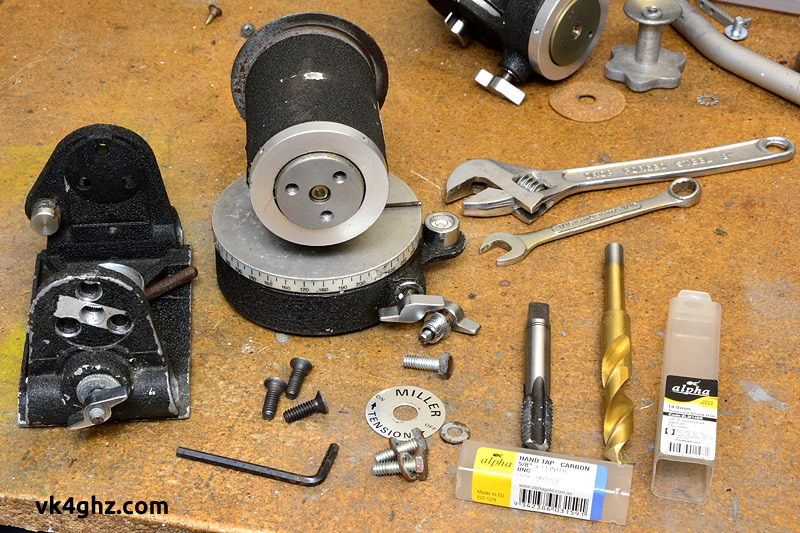
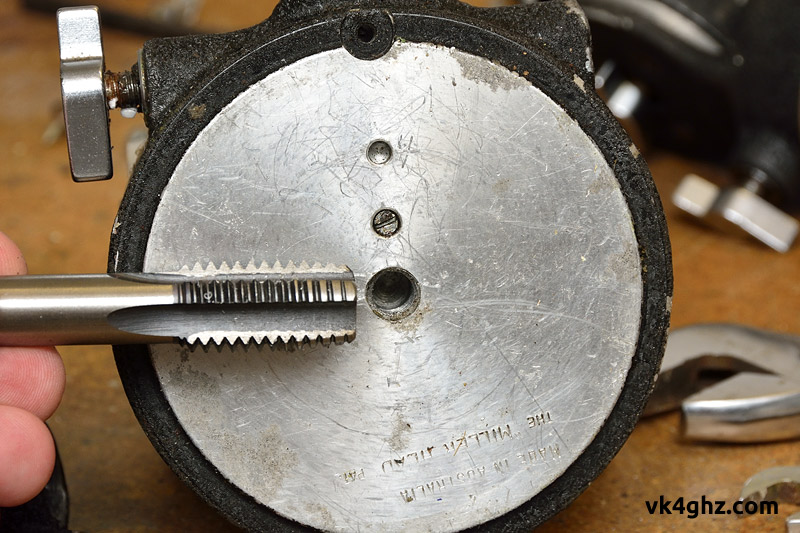

Start with an 8mm drill bit, and work your way up to 14mm.
ie: 8mm > 10mm > 12mm > 14mm.
Before you tap: You will need to drill down 5mm deeper into the head so that it “bolts up” tight to the tripod’s flat surface.
Alternatively, the threaded bolt section on the tripod could be be shortened with a grinder.
A metal tab was welded onto the (short) existing platform screw lock handle (where the equipment tray screws on to), providing much more leverage. Optional, but worth doing.
To prevent slippage of the tilt lock ring, I drilled out two holes and tapped them M3, so that two M3 bolts can positively lock the tilt lock ring. Again, optional, but worth doing, while you’re working on it.
Watch the video that covers the Miller fluid head modifications:
Keep an eye out for heavy duty fluid heads like this.
They are much more robust (and less expensive!) than the new flimsy plastic heads these days.


