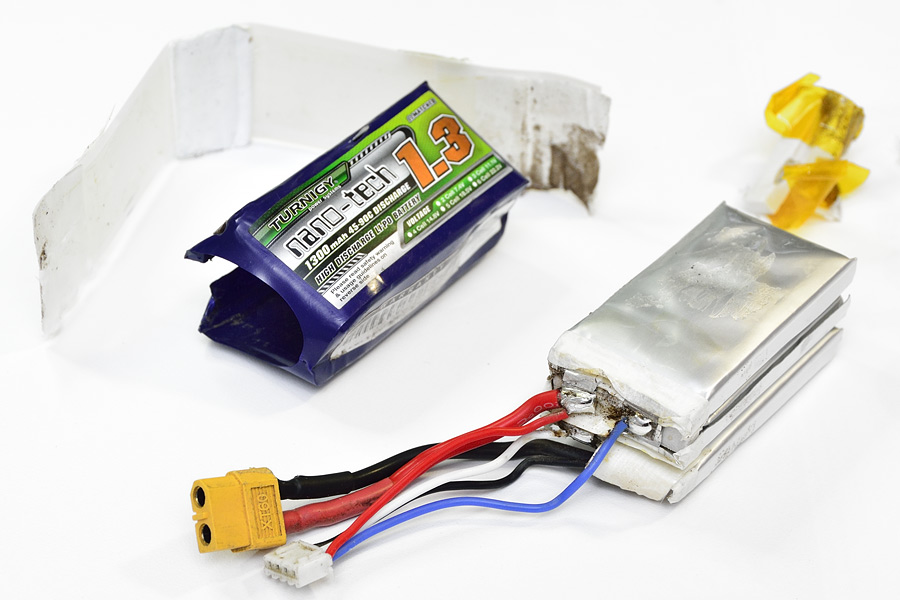
Well, it happened!

Blackout Mini H Quad got stuck up in a gum tree, and the 3S LiPo drained down before it could be recovered.
As it turned out, cells 1 and 3 didn’t get below the fatal 3.1V threshold, and turned out to be ok.
But cell 2, the middle cell, was cactused.
What to do?
Throw it away, or have a peek inside.

It was decided to turn this into a 2S LiPo pack.
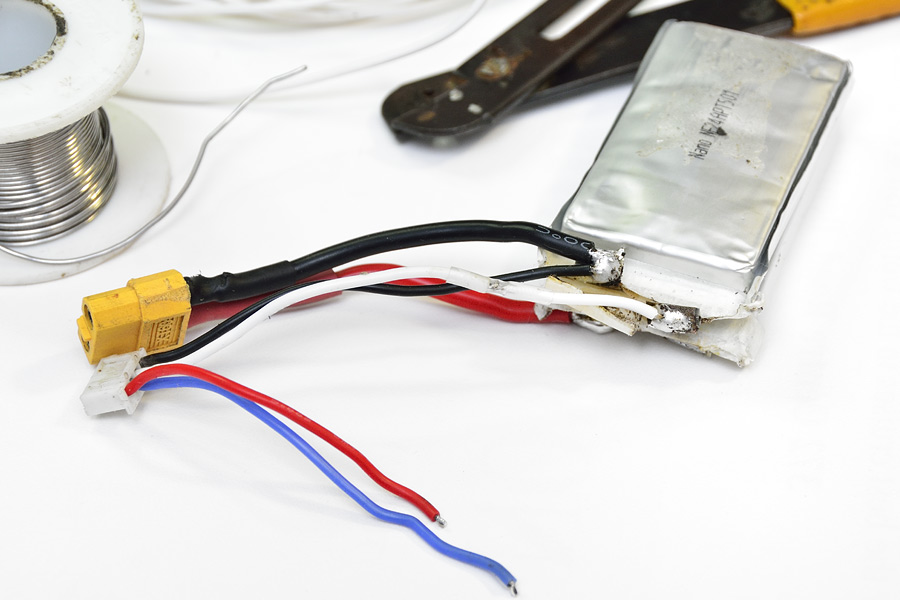
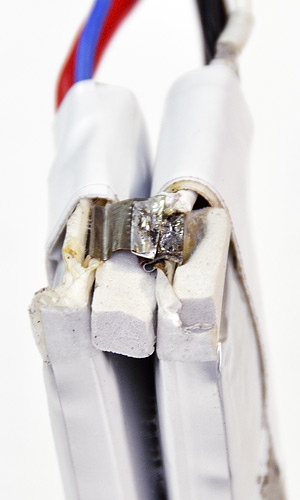
First step is to open it up, and de-solder the connections either side of cell 2:
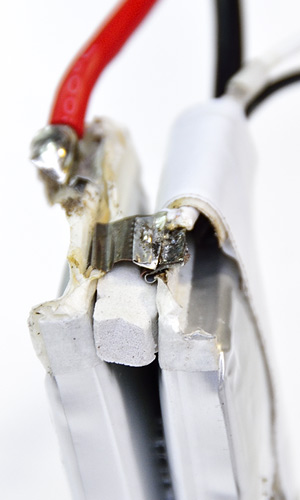
One of the cells needs to be re-orientated, so the -VE tab of one cell can be soldered to the +VE tab of the other.
You will notice the main black -VE wire needs trimming:

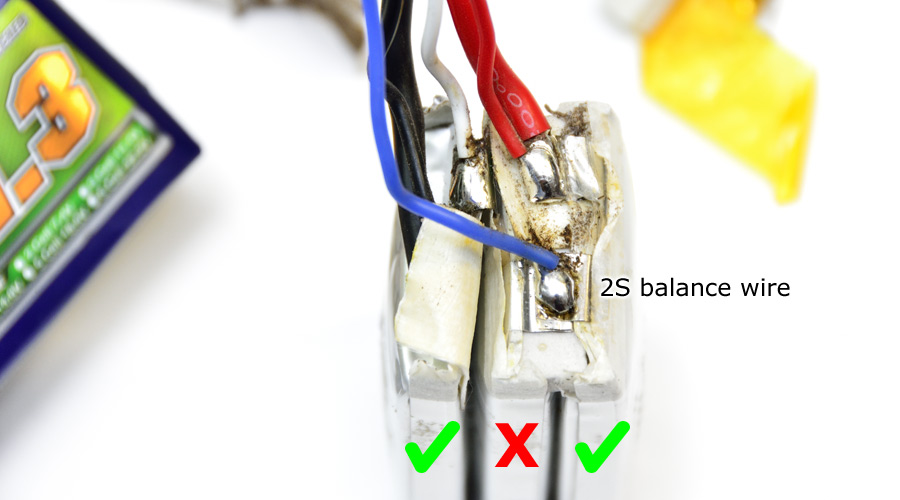
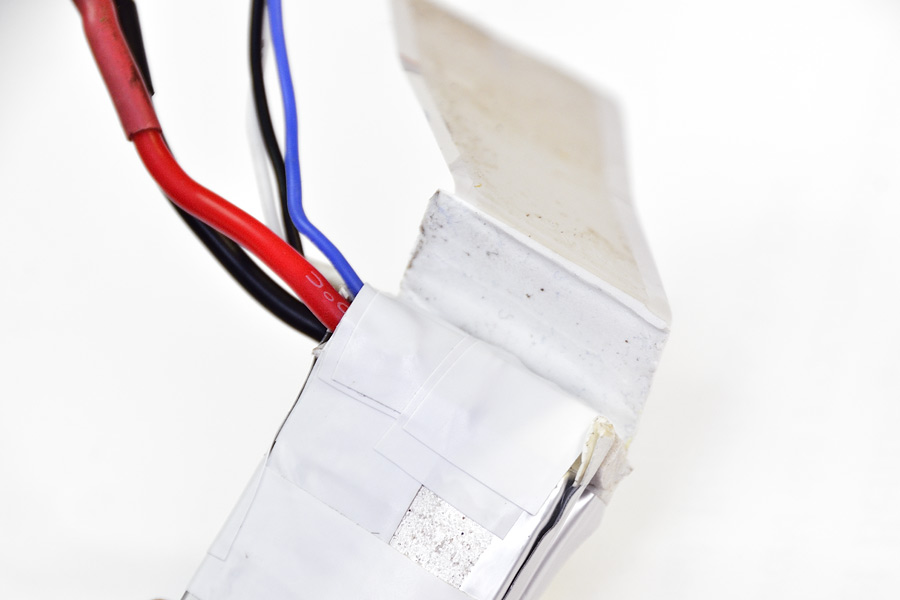
Balance lead needs to be re-orientated to the other side, and the white balance lead needs extending.
Clear heat shrink over the join:
Negative tab of cell 2 is sweat soldered to the positive tab of cell 1, and blue balance port lead now solders to the +VE terminal:
Cover main terminals with multiple layers of PVC tape.
Note the re-used packing material to prevent compression flexing around the sweat-soldered join.
Tape around both cells, and refit the main cover.
This time, to protect the new joins, the re-inforced end is used at the terminals end:
Next we fit the original casing:
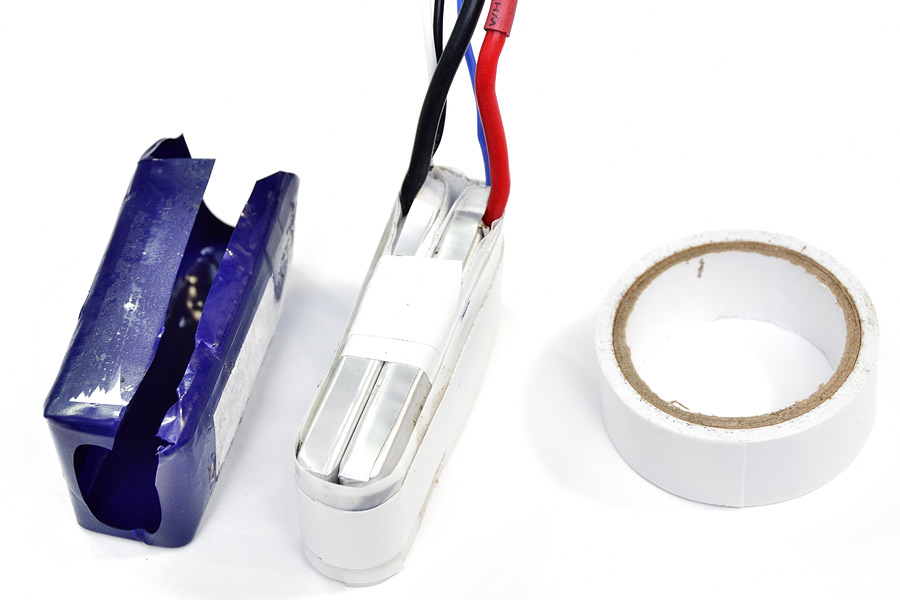
Remove red wire from balance lead (which went to the 3rd cell).
All taped together:

Even though this is plugged into the 3S balance port on the charger, it will only be recognised as a 2S LiPo.
There is no need to change the actual connector.
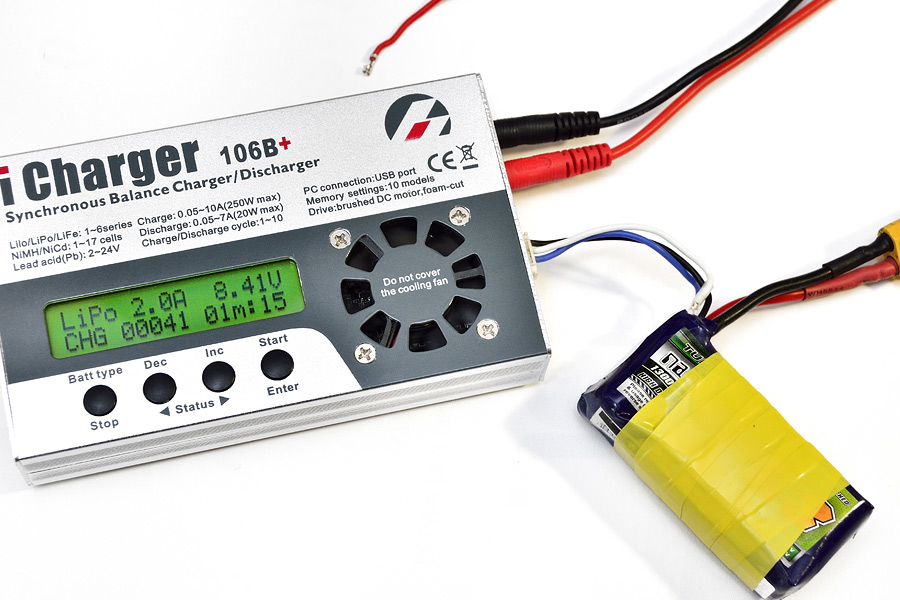
Now we have a 2S LiPo, and it works a treat.
Oh… and video of the actual recovery moment!
🙂