An Eltek Flatpack2 HE 48V/2000W rectifier is being used as the power supply for a 23cm 600W LDMOS Power Amplifier project.
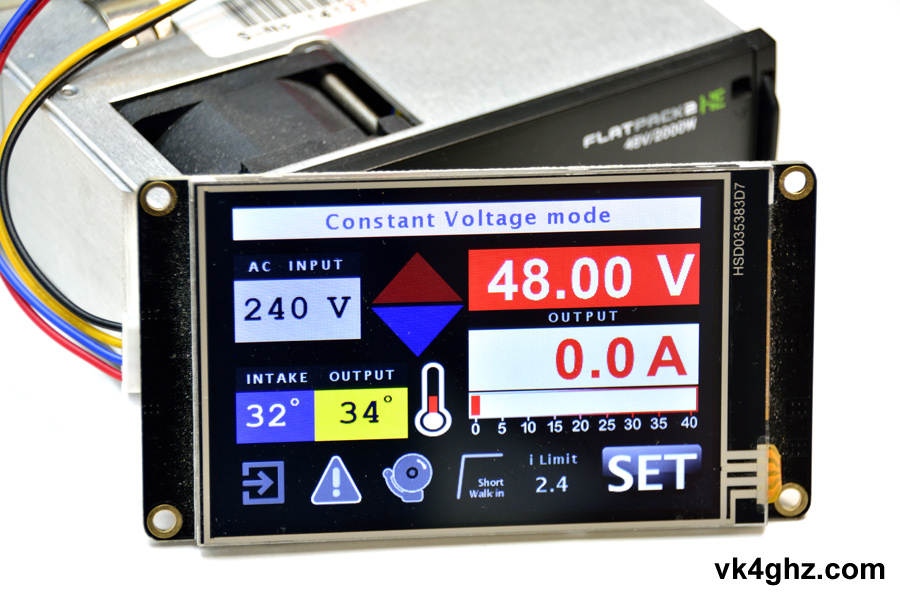
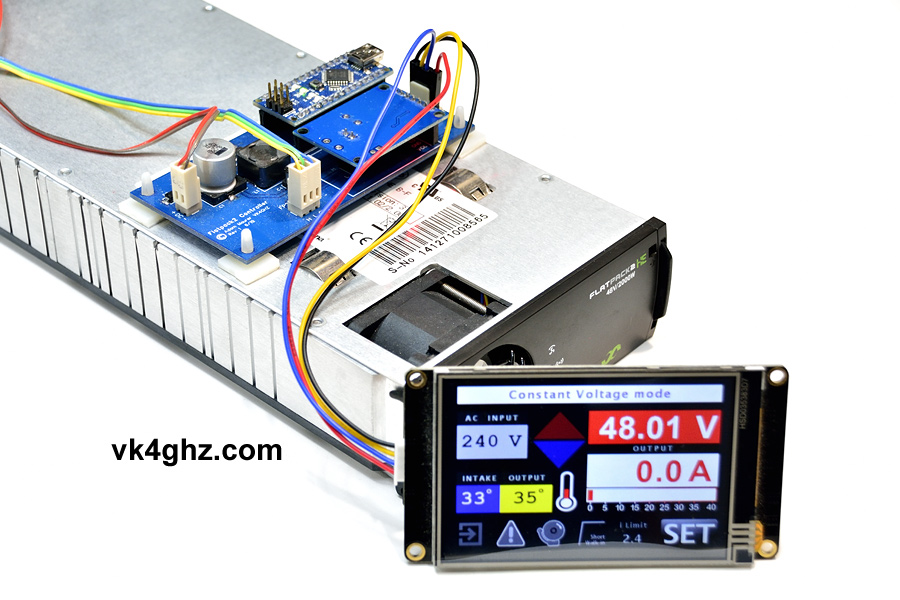
This touchscreen controller has been developed to control the Flatpack2 HE 48V/2000W, and display its data.
This controller connects to a single Eltek Flatpack2 HE 48V/2000W rectifier and provides monitoring of these parameters:
• AC Volts in
• DC Volts out
• Load current
• Intake temperature
• Output temperature
• Operating status
• and any alarm/warning messages it generates
Note: There have been many subtle improvements since that video was shot.
Main screen:

Current (as in ‘now’) voltage can also be shifted up or down in 200mV steps by touching the UP/DOWN arrows.
This does not affect the default start up voltage.
Main Screen SET Button
A short press of the ‘SET’ button will reset the screen saver, if Screen Saver is enabled.
A long press of the ‘SET’ button will take you to the Set Menu page.
Parameter Font and Colours
Foreground and background colours of each parameter (Status, ACV in, Intake Temp, Output Temp, DCV out, I out, Warning messages, Alarm messages) can be adjusted.
Simply touch the parameter to set the colour and font.
There is a choice of two fonts.
Adjust the R, G & B slider to set the desired colours.
eg: Set DC Volts Output Font screen:

Set Menu:

Screen Settings page:
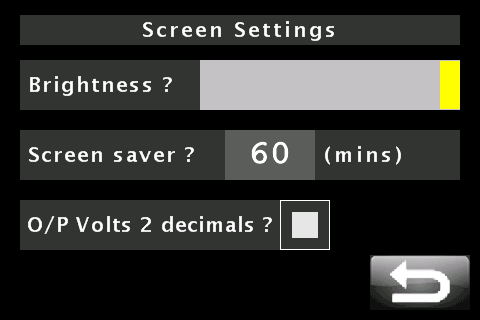
• Screen brightness
• Screen saver (enter 0 to disable screen saver)
• Output voltage 2 decimal place checkbox (unchecked = 1 decimal place)
General Settings page:

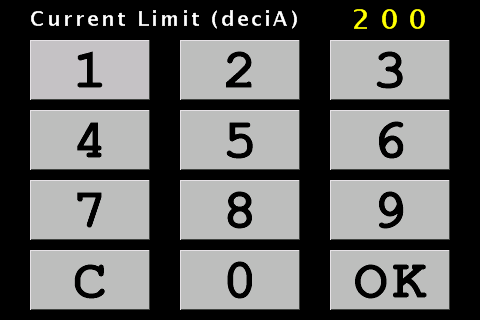
• Current Limit entered as deciAmps by kepad, ie: 200 deciAmps = 20.0 A
• Long ‘walk-in’ checkbox (unchecked = short walk-in)
Set Current Limit Keypad page:
Set Default Volts page:

• Voltage entered as deciVolts by keypad, ie: 48.00 V = 4800
Set Default Voltage Keypad page:

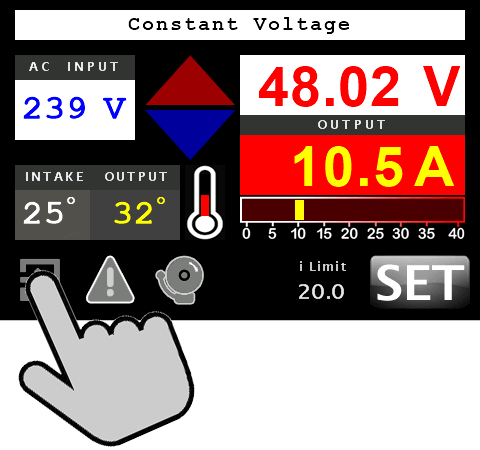
Warning/alarm Condition:
If an alarm state or warning state (or both) is detected, the appropriate icons become red.
Clicking on either of these icons will take you to the Warning/Alarms page.

Warnings/Alarms page:

Arduino and Nextion Reset
Touch the un-highlighted login icon to reset Arduino Nano and Nextion display.
This is handy if, for some reason, the serial number is not read correctly on boot-up.
PCB Mounting scheme
Purchase a fully assembled and tested controller from the VK4GHZ.com Shop.