Time for some fun! 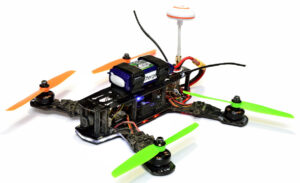
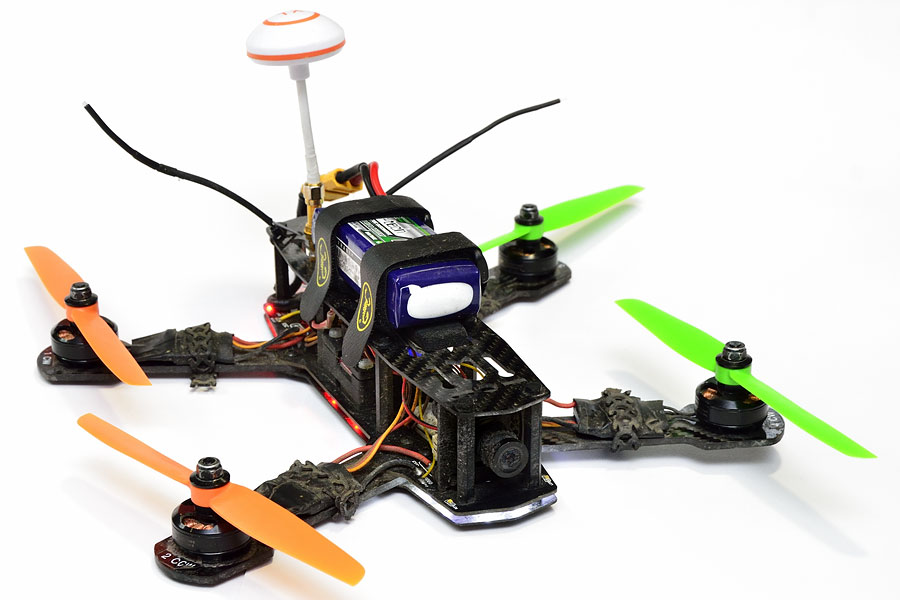
Small, fast, and agile “FPV” racing quadcopters are becoming popular, with a camera mounted at the front, where the operator is watching a real-time video feed whilst wearing goggles (or watching on a screen) to fly the quad with a First Person View (FPV).
Frame
Whilst there are many types and brands of small quadcopter frames to choose from, a genuine “Blackout Mini H Quad” frame was chosen. “Genuine” because this is the frame that has been cloned by many others.
Why?
Because it’s a great design, and the genuine frame is reported to be virtually indestructible. You will find many stories on the various forums about the cheaper clones breaking, where the genuine “BOs” don’t.
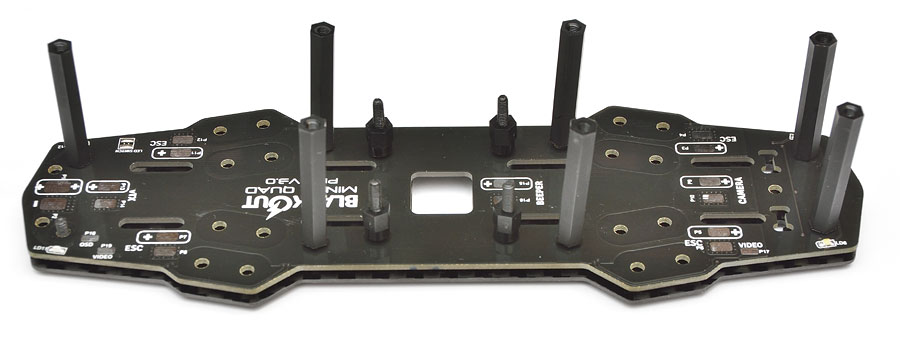
Blackout Mini H Quad frame kit with the extended arms that allow for 6″ propellers:
(Standard arms only accommodate 5″ props)

• top and bottom plates: 1mm carbon fibre
• version 3 Power Distribution Board (PDB)
• arms: 3mm Quasi Isotropic 3K weave carbon fibre
Soon into assembly, it became apparent that one nylon post was missing from the kit.
Time for disassembly, and a stock take – should have done that first!
Some spares are included, but on a seemingly adhoc basis.
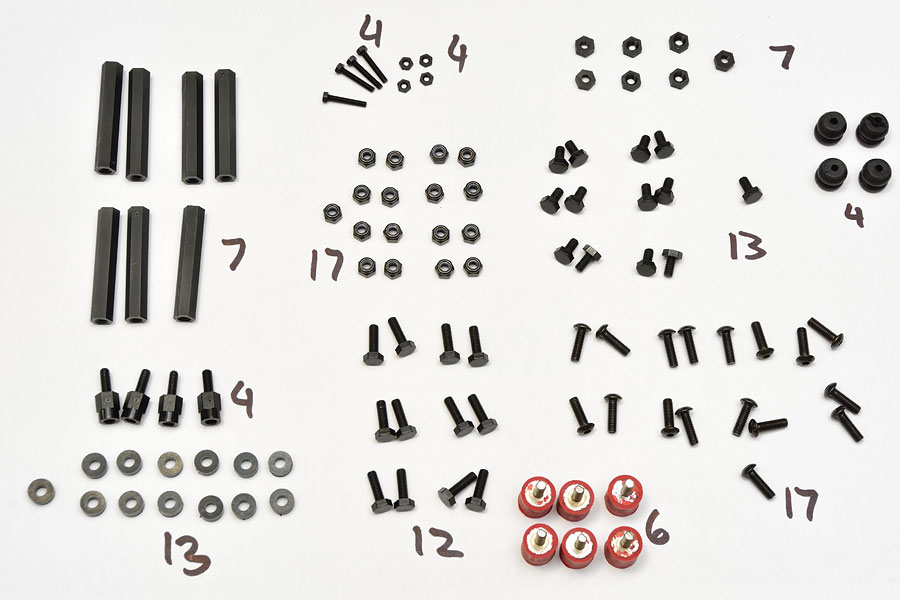
Mini H Quad were contacted about this shortfall (picture above was sent to them), and without any fuss, a kit of spares was sent.
A few days later (gotta love local suppliers, and not wait weeks for o/s shipments to arrive!), the build continued.
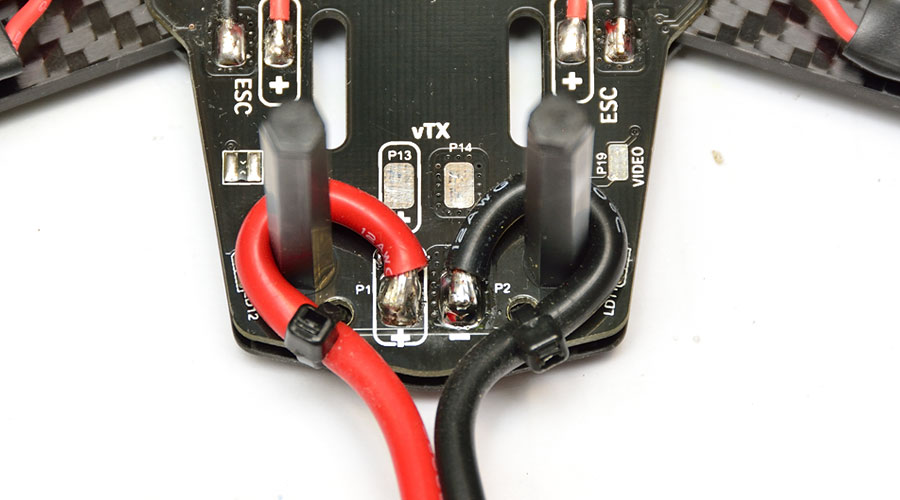
Power Lead
12AWG LiPo battery leads wrap around the two rear posts and are cable tied to the PDB (Power Distribution Board) for strain relief.
Electronic Speed Controllers
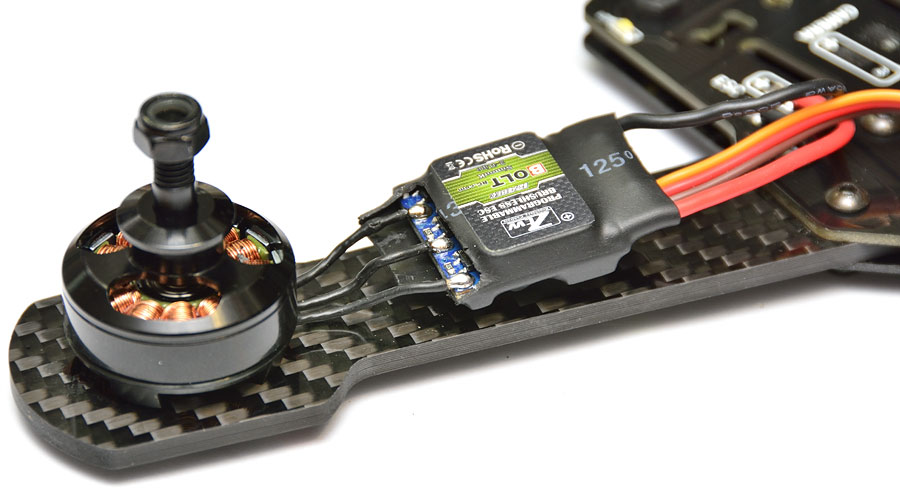
ESCs are ZTW 12A pre-programmed with SimonK firmware, from BoltRC.
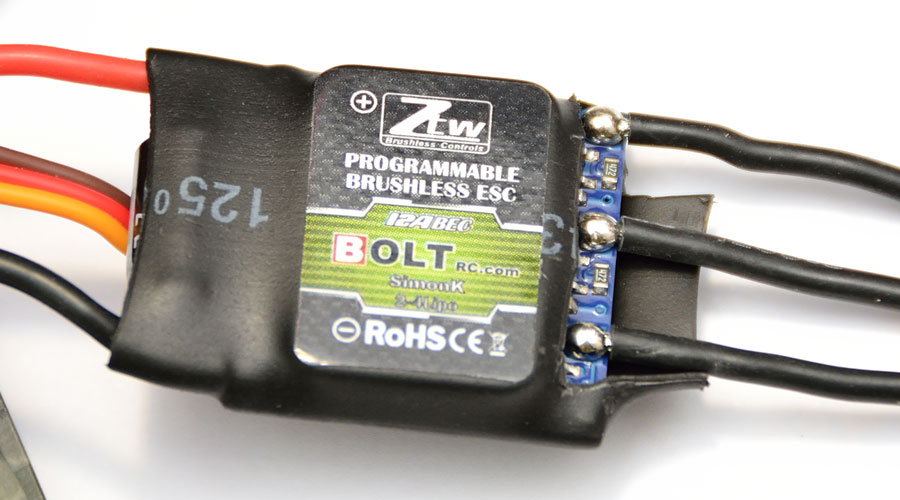
Heatshrink casing was cut and peeled back, so the standard ESC motor wires could be de-soldered.
Motors
Motors chosen for this build are the Cobra CM2204-32, from Buzz Hobbies in Perth. At $22 each, these are great bang for the buck, and many are running these on 4S.
These are a 1960kV motor, and have a integrated 5mm shaft, so that propellers with a 5mm hole (ie HQ Prop) can fit directly on, with no prop adapter required.
Here we see the full-length motor wires temporarily soldered to the ESC.
Once correct motor direction has been ascertained, the motor wires can be trimmed back to what’s actually required, and the ESC heatshrink taped back up again.

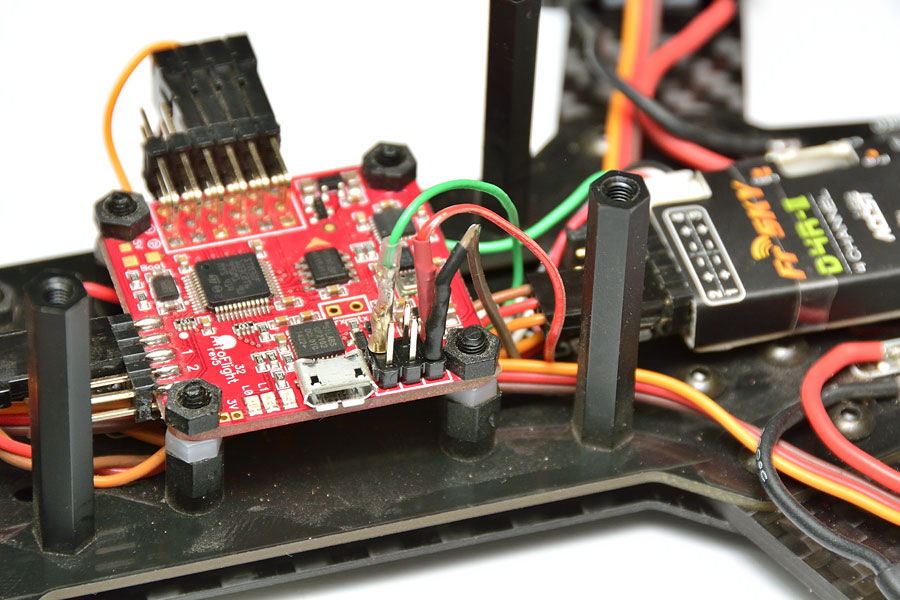
Flight Controller & R/C Receiver
FC is the popular Naze32 Funfly from BoltRC.
The Naze32 comes in two flavours, the basic $30 Naze32 “Acro” board does not have a barometer nor magnetometer sensor, whereas the $60 “Funfly” version does. These extra sensors are used in some flight modes to help stabilise the orientation of the craft.
Whether you end up using these sensor in your style of flying, or not, it’s worth spending the paltry $30 more to have them, just in case.
Also seen here is the FrSky D4R receiver from BoltRC.
This receiver is capable of 8 channels, and “PPM” output.
PPM output is similar to S-Bus, where all the channels can appear (serialised) on the one output port, minimising the messy wiring between the receiver and Flight Controller. ie; One cable required, instead of eight.
In normal orientation, the micro USB port would face rearward.
With a frame fully assembled, this is a pain to connect to, so the Naze32 was rotated 90°, so that it was on the port side of the craft.
When doing this, don’t forget to configure the Naze32 with:
set align_board_yaw = 90
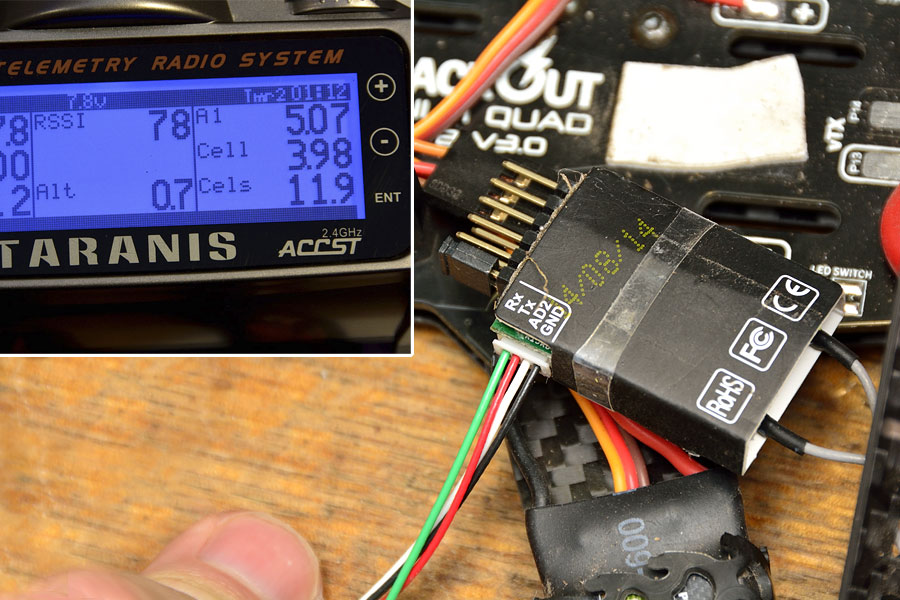
R/C Receiver Telemetry
FrSky D4R receiver has a port that allows for sending telemetry data back to an FRSky Taranis radio system.
This can be used for reporting the LiPo battery volts, and RSSI (Relative Signal Strength Indicator) so this information can be seen on a Taranis telemetry page, right in front of the operator.
travisgrindal has a YouTube video about setting up a Naze32 and FrSky D4R receiver for telemetry found here.
3:00 onwards is relevant.
Trim Motor Wires
With all the electronics wired up, and having spun up the motors to check/adjust direction in a motor test, motor leads can now be trimmed to suit.
Rapstrap

ESCs are held in place with Rapstrap.
Rapstrap is a soft, flexible and elastic cable tie made of rubber that won’t crush or damage the item you are trying to secure like a conventional cable tie might. It comes in green, clear and black, and a strip can be cut to the required length. They’re also re-usable.
Simply brilliant!
Some hobby stores sell straps in 2 or 3, but you can buy a packet of 12 from 4Cabling for the same price.
Motor Port Vulnerability
With the Naze32 board turned 90° so the micro USB port is more accessible, it doesn’t take long to realise the motor ports become extremely vulnerable, poking out the starboard side.

These right angle headers that were supplied with the Naze 32 have to go!
The best way to remove a header like this (ie minimise potential damage to the pads and plated-through holes), without a professional powered de-soldering station, is to remove one pin at a time. Rather than trying to remove many pins at once.
Cut each pin, and remove by simply heating the pin up with the soldering iron.
Hey, Americans!
Have you ever noticed the “L” in the word solder? 😉

With the pins removed, we can now clean up the plated-through holes with solder wick.
I find it helps the wicking immensely, if you smear a flux pen along both sides of the solderwick.
Conventional header strip (28-way) was purchased from Jaycar to replace the R/A header.

This is much better.
It’s just plain dumb including right angle headers, when conventional headers are more practical.

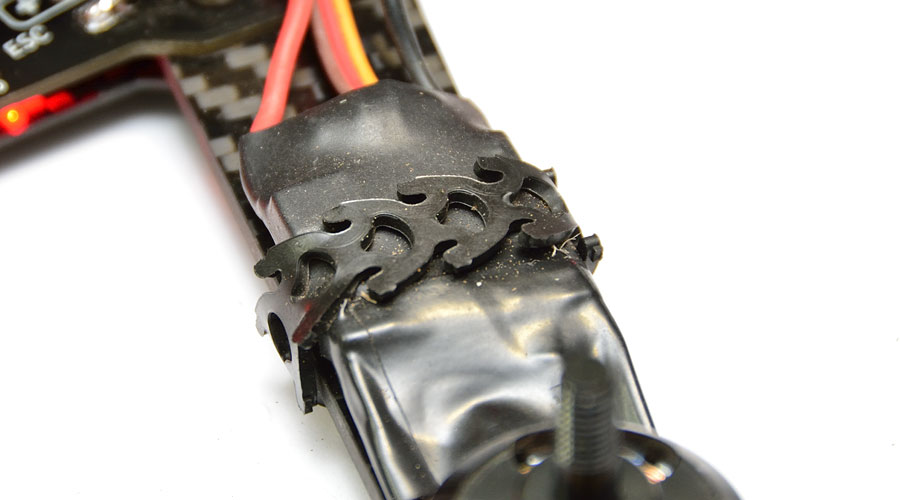
Lost Model Beeper
A spare piezo buzzer and some servo leads make an ideal lost model beeper. Trust me – just fit one from the beginning! 😉

This will plug straight onto the Naze32 header pins. The buzzer simply straddles one of the nylon posts.
It can help locate a lost quad in a snake infested scrub. (LOL):

Since these pictures were taken, I have replaced the piezo from Jaycar with a buzzer from NextFPV, which is louder.
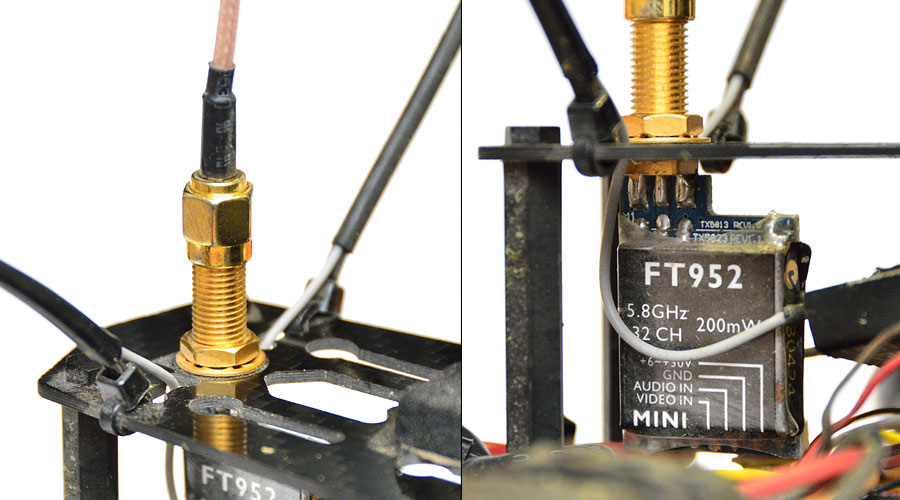
Video Transmitter
VTX is a FT952 32 Channel 200mW 5.8 GHz unit. I have 4 of these now, and unlike other brands/models, they “just work”.
Having the flexibility of operating well away from the crowded Fatshark channels (only 8, with 20 MHz spacing) is handy on the field with others. 5665 MHz is mine. Stay away! 😉

During a moment of insanity, I initially purchased a Skyzone branded TS5823 VTX. It was cheap and I was buying other stuff from the vendor anyway. What could go wrong?
As a mater of course, I check out all new transmitters on the HP 8562A spectrum analyser.
What a piece of shit!
Aside from being down in output power, changing the DIP switches didn’t change frequency at all – it just drifted around 5800 – 5809 MHz, it’s upper limit. Sometimes it would power up around 5400 MHz, most likely the VCOs lower limit. The PLL on this board is obviously faulty.
With the Skyzone VTX as landfill, the FT952’s standard stubby SMA (f) jack is being replaced with a long PCB launcher SMA (f) jack.
For those in Brisbane, these SMA jacks are available from the RFShop. This is a great family run business that operates from a home in Oxley. They allow payment on pickup, but please telephone ahead before you arrive. Most of RFShop’s stock is “Jyebao” branded (made in Taiwan), and can be better quality than the cheaper Chinese equivalents.
If you’re not in a hurry, and have a larger order, then I have used RFSupplier (Shenzen, China) many times for my ham radio needs. With the 100+ connectors and adapters I have purchased over the years from RF Supplier, the only duds have been the threads on Type N’s. SMAs have been fine.
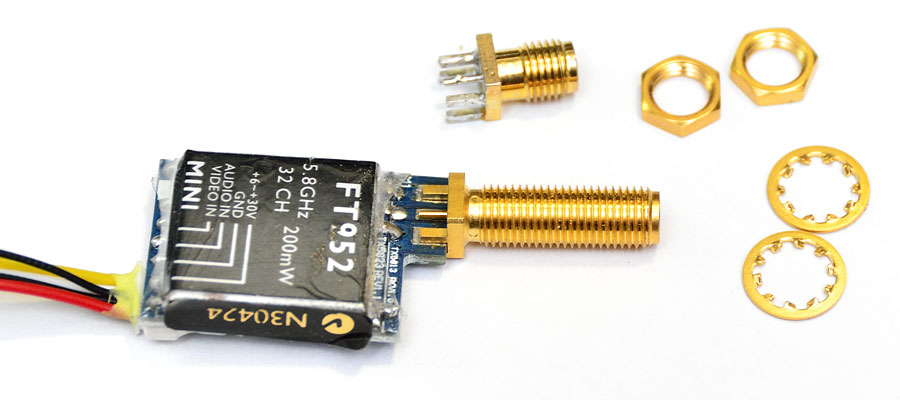
Fitting this long launcher jack allows us to mount the SMA directly to the frame.
• no adapters
• no RG316 flying leads
• no extra connectors in the path
• absolute minimal loss at 5.8 GHz
These transmitter modules get warm during operation, so that rules out using double-sided tape to mount, as any adhesive would become soft and tacky, and ineffective. On other (larger) drone configurations I use rapstrap to hold a VTX down with.
Many R/C flyers can be oblivious to the losses in between their transmitter and antenna at microwave frequencies.
A lead of 100mm of RG316 coax cable will have about 0.2dB loss @ 5.8 GHz.
Add connectors at each end for 0.1 dB loss each
Add an inline adapter for another ~ 0.2dB loss.
Add ~ 70mm of coax running up the clover leaf for 0.15dB loss.
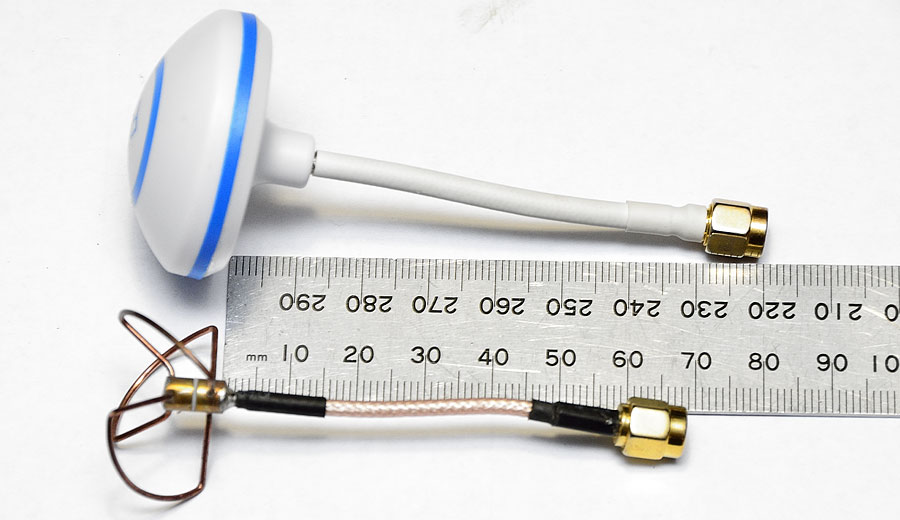
It’s very easy to accumulate ~ 0.7 dB of loss.
Doesn’t sound like much, does it?
Take your 200 mW transmitter putting out +23 dBm.
Subtract 0.7 dB from that, and we have 22.3 dBm.
Using the on-line Watts to dBm converter: 22.3 dBm = 170 mW.
We’ve lost 15% of our power in feedline and adapter losses, before it reaches the actual antenna!
R/C Receiver antenna mounting
FrSky D4R 2.4 GHz receiver antenna dipoles are held in place using cable ties as a semi-rigid support.
Tension up the cable ties, and fit heatshrink over it and the antenna.
This helps to keep them out of the propellers!

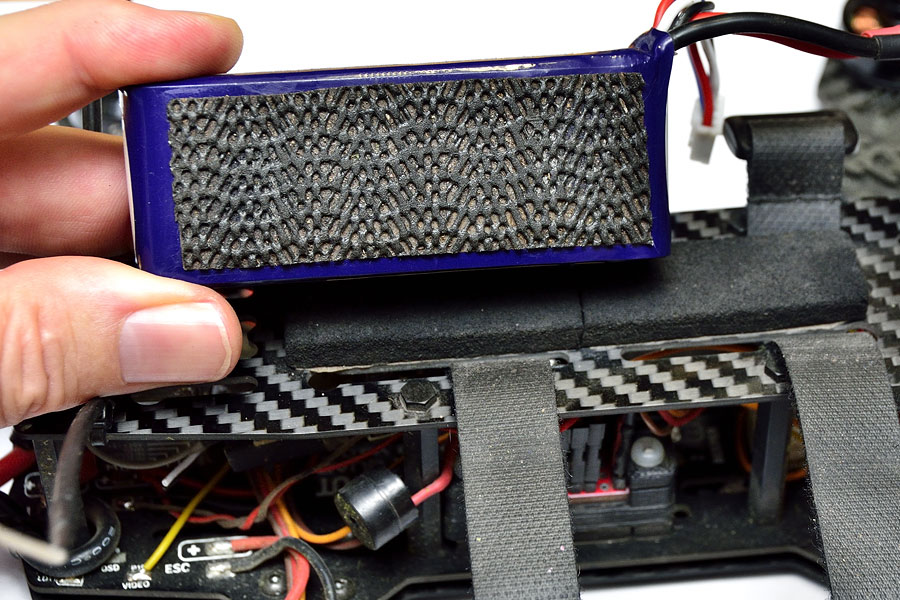
Battery Pad
Some rubber strip (dunno where it came from originally – found in the garage) was fitted to the top plate, as a battery pad.

All LiPo batteries have some self adhesive non-slip battery pad material fitted.
It comes in a 75mm wide strip, about 1mm thick, in lengths of 310mm for around $5.50 posted. You can do many batteries with this.
(I would include a link, but the eBayer I bought this off no longer has them in his store)
Battery straps are “Scorpion” lock straps, size “small” (200mm long). These have a rubberised backing, and really grab the battery.
With most suppliers in Australia out of stock (gee, what a surprise!), they were purchased from Align-Trex.co.uk.
Six of them (ie; 2 x pack of 3) cost AU$31.81 delivered, and arrived in 10 days.
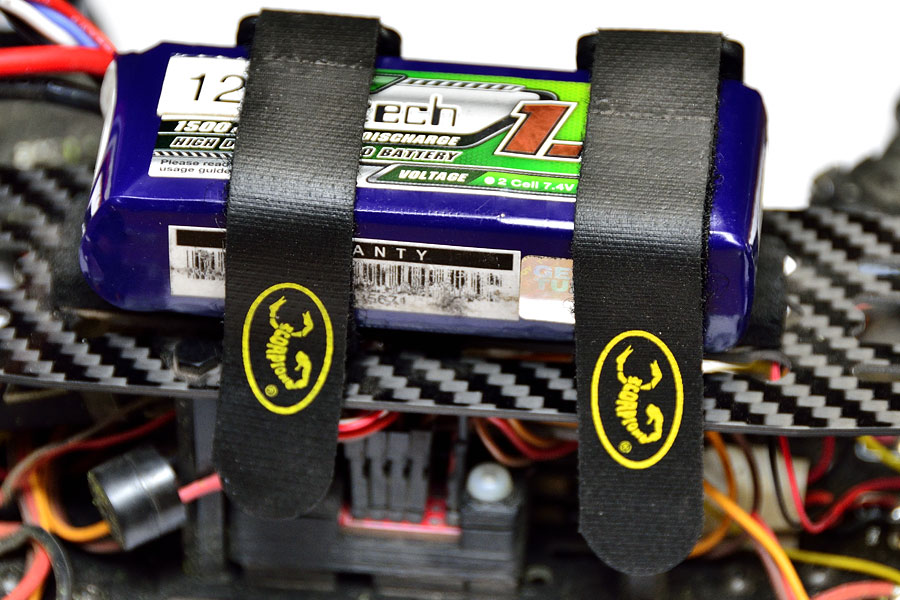
The rubber battery pad, rubberised backing on each battery, and the Scorpion lock straps means the battery “sticks like shit to a nappy!”
Oh, and you can just see how the piezo buzzer straddles one of the posts (as mentioned above) in the photo as well.
FPV Camera
FPV camera is a 960H 800TVL, featuring a 1/3″ Sony CCD sensor, Effio-V chipset, and 2.8mm lens.
These have replaced the once popular PZ0420 as the “go to” FPV camera.
It runs off 12V, and Pololu step-down and step-up inverter boards are used to derive a regulated +12V.
ie: 3S or 4S battery supply > Pololu step-down to 5V > Pololu step-up to +12V.
(Sorry no pictures of this)
Effio-V cameras purchased from SurveilZone for just over AU$50 each.
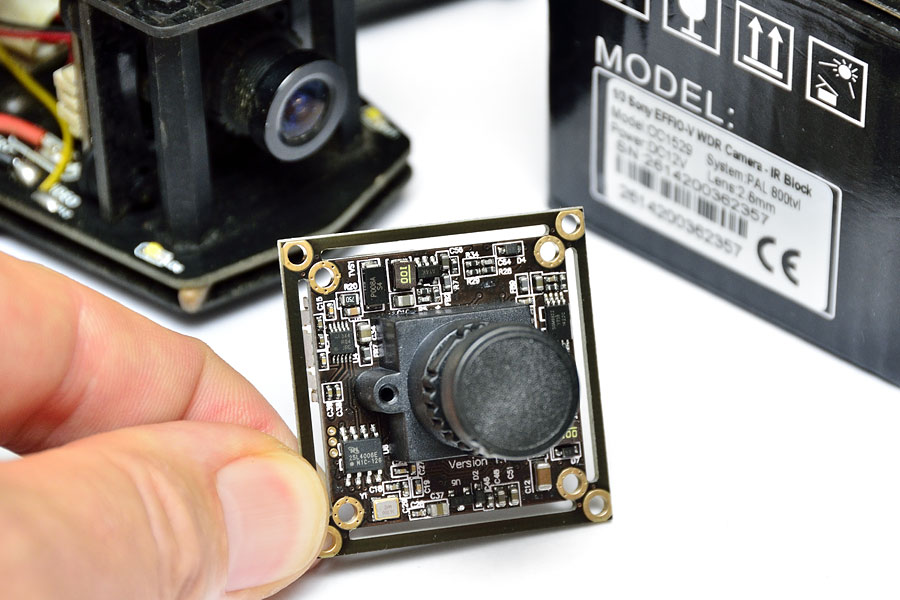
See exactly what you receive, and mounting them to the FPV camera plate, in this video: ![]()
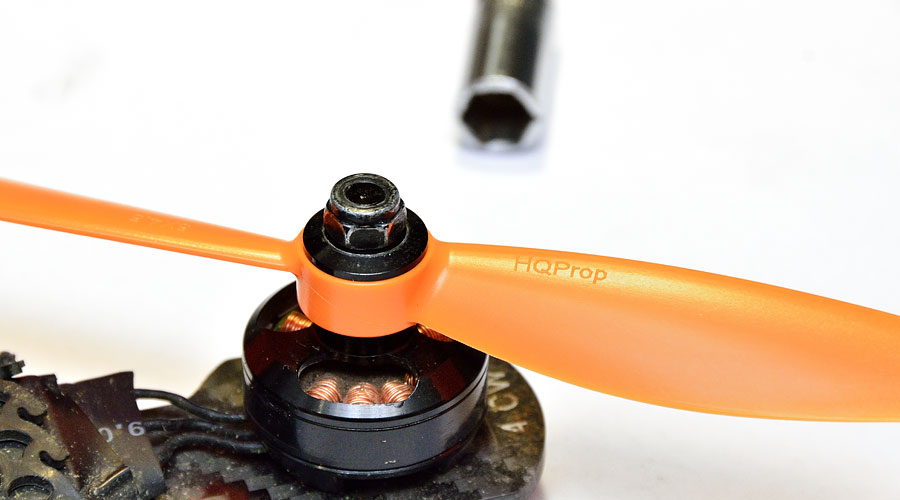
Propellers
Everybody is raving about HQProp propellers!
HQProp propellers come from Buzz Hobbies (Perth, but on your door 2 days later with $10 express satchel delivery) and WarpQuad, are made from a carbon/plastic composite that claims to be “stiff and provide a quieter and smooth flight”.
These props have a 5mm hole and fit directly to the Cobra motors shafts. ie; CM2204 motors do not have a bolt-on prop adapter – the prop shaft is 5mm native. One less thing to become loose.
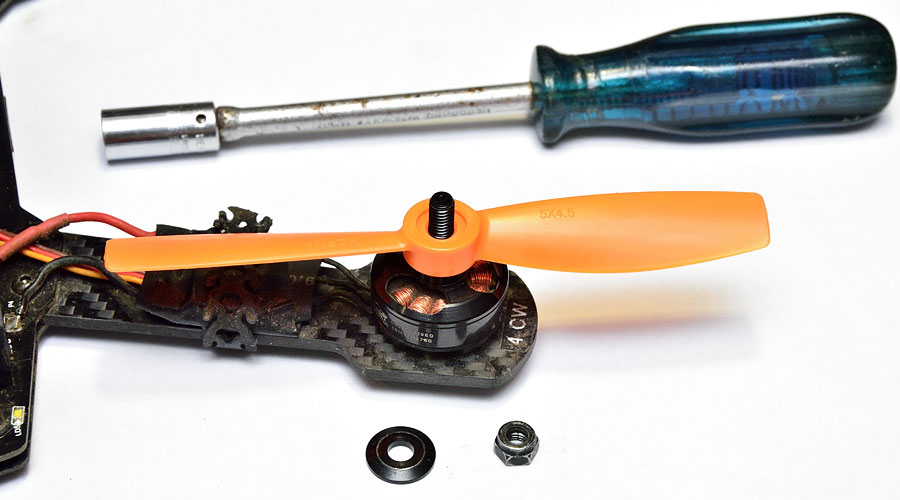
A 5/16″ socket wrench makes it quick and easy to fit and remove lock-nuts and propellers to the Cobra CM2204-32 motors.
Idiot Proofing!
To eliminate fitting a wrong propeller, labels are fitted to the end of each arm, to indicate the correct propeller.
Simple and effective against brain farts.

So that’s my Blackout Mini H Quad.
The Naze32 Flight Controller is running Cleanflight firmware, and configuration uses the Google Chrome Cleanflight Configurator app.
Lots of fun to build, and even more fun flying it!

It’s a bit grotty in this picture, especially the front, but grass, dirt, and trees tend to do that!
🙂